Showing posts with label Jen Ken Kilns. Show all posts

Thursday, June 11, 2015

Summer/Fall 2015 On the Road!

Classes on The Road!

Teaching is one of the most gratifying things I do as an artist.  I love my students! Helping a student realize their goals, dreams, and potential is exciting and fulfilling to me. Whether it's a technical challenge or a concept development issue, I love the the actions of problem solving and overcoming hurdles. Sharing the laughter and support of fellow students during the process, well it just can't be beat! Catch one of my classes in my home studio outside of San Antonio, TX, or jump into one of my classes on the road!

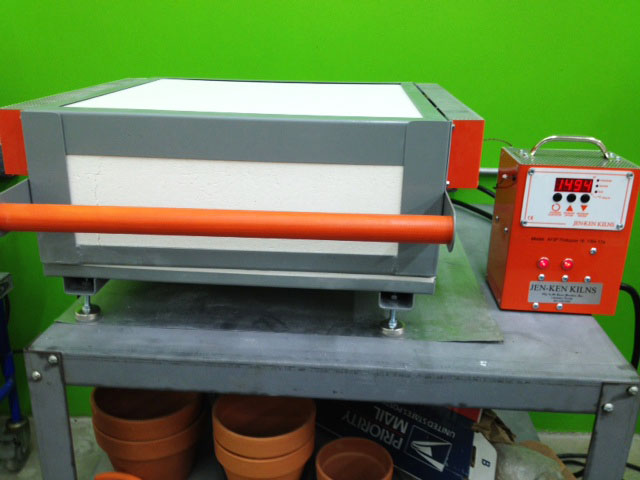
July 18 - 19, 2015 - Jen-Ken Kilns, Lakeland, FL. - Hot Stuff - Harnessing Flow in Your Kiln

Aug. 21, 2015 - BeadFest, Philadelphia, PA. - Metal Clay 960; Lentil Beads with Stones

Aug. 22, 2015 - BeadFest, Philadelphia, PA. - Metal Clay Pendants with Vintage China

Oct. 30 - Nov. 1 - SiNaCa Studios, Fort Worth, Texas - Sculptural Glass with Imagery

Nov. 6 - 8, 2015 - Milkweed Arts, Phoenix Arizona - Sculptural Glass with Imagery


Hot Stuff - Harnessing Flow in Your Kiln

In this fast paced 2-day workshop students will learn the secrets to creating the elusive progressive pattern bar and spectacular pot and screen melts! We'll even learn the set ups for beautiful vitrograph cane! All these exciting techniques create fantastic components for use in sculptural and functional glasswork. Each student will use their choice of centerpiece components to create a gorgeous cheese tray using the new Patty Gray Dam Mold. Students will gain the knowledge of set up and layout of pattern bars, pot melts, and screen melts in the kiln, firing schedules and kiln programming, building dams, pulling vitrograph cane, cutting cane, and more. Be prepared for FUN! We'll be setting up and running kilns, prepping molds, using tile saws, lap wheels, grinders, the sandblaster, and pulling hot glass from the kilns! Students; Please wear closed toe shoes, bring a 100% cotton long sleeved shirt, & safety glasses. Some glass fusing experience is required.

Metal Clay 960; Lentil Beads with Stones

PMC 960 Sterling Silver is an exciting medium that allows you to produce quality, detailed hollow designs in sterling silver without the mess or equipment required for traditional jewelry casting. Beginners will love the ability to create personalized, one-of-a-kind lentil focal beads that they can wear alone on a chain, or add to their favorite beaded designs. In just one day students will create enviable heirloom quality silver pendants that work with any style.

Metal Clay Pendants with Vintage China

Jump into Bezel Setting in Metal Clay! This workshop will introduce you to the exciting world of setting inclusions Metal Clay. We will work with PMC 3 and fine silver bezel wire, to add beautiful vintage china shards and make pendants that are truly romantic, art deco, Asian and more! Don't miss this hybrid approach to new techniques in soldering on metal clay that will open the door to loads of new possibilities in jewelry making.
Sculptural Glass with Imagery

Take your fused glass beyond the bowl! It’s time to create light catching sculpture communicates. It doesn’t matter if you’re going for a loose abstract design or a photographic image, you’ll learn how to make it happen in this exciting new workshop! Each new skill and technique can be applied to small work as well as larger projects, making this a “don’t miss” class. The focus of this workshop is on the development and printing of images in tall, transparent, slab sculptures. Students will learn screen-printing, powder applications, and direct painting techniques to apply their imagery to multiple layers of glass. The image layers will then be fired, stacked, and fired again to create tall thick slabs of transparent glass. The slabs will then be cut, ground, polished and mounted on steel bases. Students will become skilled at preparing personalized images, creating their own screens, painting and layering powders and enamels, and mastering the firing schedules that deliver success. In addition, students will experience effective kiln casting and cold working techniques. Each student will cut, grind and polish their pieces, and learn how to mount their base pieces. Fusing experience is necessary to participate, but advanced skills are not required to be successful!

Tuesday, October 28, 2014

BeadFest Santa Fe and More!! Can't Wait!

It's been a while since I've slowed down to blog. I'm forcing myself to buckle down this week! The studio has been going through some growing pains and we're adding new equipment and more space to the workshop area. We're excited, and sore!

Anyway, I'm thrilled to announce my new teaching schedule for next year will be posted on my site!
It includes January at the Fired Arts Academy at Jen-Ken Kilns, February at Sinaca Studios in Fort Worth, March at BeadFest Santa Fe, April in Las Vegas at the Glass Craft Expo, and May in London and Zurich at Creative Glass.

I'll still be doing my thing at Roadhouse Arts, just north of San Antonio! Come visit with me at any of my adventures!

Here are a few pix of the cool stuff I'll be sharing with my students:


Sunday, February 12, 2012

My future as a kiln repairman

I have successfully changed the relay and the kiln is humming along with little fanfare. What I can say is that although it was a major pain in the rump, I did it and it wasn't that hard. It actually helps when you have the tools and the parts you need BEFORE you have breakdown.

Let that be a lesson to everyone. Order extra relays and a 1/4" nut driver NOW!

Just can not catch a break!

The next morning after I foolishly thought I had things back on track, I came in to find the kiln with a stuck relay. The kiln went to 1650 and hung out there for 9 hrs. So another batch completely ruined and not recoverable. This morning I have to go in and change the relay, clean the kiln and see if I can salvage this.

On a happy note, I decided that I needed to be calm and not cry over ruined glass. So I decided to work on my printing samples. Here's what came out of the kiln and what I put back in.

Saturday, February 11, 2012

Troubles in Glass Paradise!

If you've been following the saga of the 45 draped vases for City Year's gala event on February 28th, no doubt that you're wondering, "So ...what happened?" So... Here's where we are on the project. 

I'm rather frustrated over the events that have occurred over the last 10 days. It seems that my in my exuberance to plow through the project, I failed to acknowledge that the draping portion of the project would be more nuanced than expected. I've done this numerous times before without any real pain or heartache so I foolishly assumed that this project would be no different. DUH!! Not so much!

The first batch of 9 that I attempted to drape were a horrible disaster. As I was placing them in the kiln, on top of the molds, Stacey (my business partner) said, "I think you should do just one. You know, to make sure that your schedule is right."  In my excitement and (foolish) confidence I replied, "Relax...I know what I'm doing. Anyway, I'm being conservative with the schedule, so I'm sure it will be fine." FAMOUS LAST WORDS! 

I opened the kiln the next day and there were beautiful gem colored rings sitting at the foot of each mold. My conservative schedule was wrong! All the discs had melted right through the molds and ended up in a heap. I was convinced that I new  what was wrong with the schedule, so I again FooLiSHLY put 9 more discs (what was I thinking?) onto the molds, and fired up the kiln again.

This time, the schedule was good! Yeah! But my happiness so gave way to the sad realization that the lips on the vases were WRONG!  

Ruffled... and not so much!

The size was right, but the lip was NOT ruffled as it should be.  Now I had screwed up 18 of the 54 discs that I cast, and I needed 45 vases. EEEEK! 

Here's where we are now; I realized that what was wrong with the lips of the vases is that the discs were too thick to ruffle. The way to thin them out was to put the discs back into the kilns and fire them to a very deep fuse (un-dammed) to allow the discs to thin and expand in size. So I did that and then draped them again using the new schedule. The result; GREAT! Everything was perfect.... except....(cue the music from the movie Jaws...) That the bodies of the vases were too thin. This means that either the temp was too high or time was too long, or both. 

Meanwhile, that meant 3 more discs bit the dust! So I had to regroup and reclaim the discs that I ruined. Stacey helped me smash up all the discs, and everything had to stop while I recast 18 of the discs back to usable condition.

Finally, yesterday I cold worked 49 discs and put 12 in the kiln to spread into thinner and larger discs. I will have to do that on all of the discs. So at 12 discs per day, that will take me to 2/14.

On 2/15 I will have 13 days left until the event! OMG! ...and not one perfectly ruffled vase to show for a month on the job. DAMMMMMMM.

I'm sure that I can pull this off in time, but it might mean that I am driving these vases to the event on 2/28! If all goes right with the kiln universe, I can drape 9 vases a day beginning on 2/15. That will take me to 2/21. It doesn't seem likely that it will happen just that way...but a girl can still dream! I will be in the studio every day making this happen.

Not toasty at all!
On a happier note, I am excited to be playing with my new Jen Ken Pro-Fusion 16 Square kiln. This thing rocks! It reaches full fuse (1470) in 39 minutes! That is killer fast for a 16" firing space. LOVE IT! I love that at 1492 degrees I can put my hand right on the top and hold it there without being burned, or even uncomfortable. Can't do that with a kiln wrapped in metal! Here she is in all of here glory!

I love that she's a clam shell too!

During the firings of the discs, I've been working on getting ready for my classes in Las Vegas. One of my classes is "Making Your Mark; Printing on Glass," and another is "Modern Jewelry; Beyond Dichroics." For both classes I'm exploring with images on glass that will come from woodcuts, stencils, stamps, free hand application/drawing, photographic images on overlays, etc. which will then be colorized with enamels, frits and powders, paints then and over or underlayed with foils, lusters, etc. 

These are some of the samples I put into the kiln last night. I put them on 0113, 0137, 0139, 0132, and 1100 to determine which colors give the best contrast and results. I'll take a picture tomorrow and show you how they came out.

All of these images I created from free clip art and vintage photos from the web. I manipulated and changed them for my purposes by eliminating backgrounds and increasing contrasts.

Thursday, January 19, 2012

25 pounds of glass!

That's a lot of glass to break. I'm doing this commission of 45 centerpieces for City Year San Antonio's Gala. I'm excited to do the work, but there sure is a lot of glass to break!

Each vase weighs 2.7 pounds so 9 in one kiln load takes about 25 pounds of shard. So I went through the process of choosing the shades, weighing it all out, making rings/dams, then weighing each of the 9 discs, and then pouring the shard into the rings and then finally firing them.

This is the turquoise batch. Then I have a red, cobalt, green, and plum batch to do. I'll show pictures as we proceed. All in all 125 pounds of bullseye glass.

It should take 5 full fuses and 5 drape kiln runs. In a perfect world. Hahaha
Like that's gonna ever happen. I'll keep you filled in!

Wednesday, December 28, 2011

So much glamour in the glass business!

What an exciting and glamourous day I've had! I did get to sleep in and hang out in my PJs in the morning, which is always an awesome thing! Then it was straight to the studio to finish the Baptismal Bowl/Font for Zion Lutheran Church. 

So here's how it went; 1st Step; I measured the disc about 75 times to make sure it was a solid 18.75" perfectly round. I ground it about 4 times to make sure it was perfectly round. Did I say it had to be perfectly round! OMG! Finally had to pull out the old cut a circle out of paper trick to lay over it. That proved to me it was done correctly. This time I was determined to measure correctly. (The lip of the last giant bowl had to be ground, beveled and polished after the slump, because I didn't double check the measurements before the slump.) So OK...lesson learned!

Here is the very glamourous machine I used to grind the disc a billion times!
2nd step; I changed from 80 grit for the take down on the lap wheel, to 200 grit and did some refining, and a slight bevel on the edges. 3rd step; I hand padded with the 400 grit diamond pad 2 times...I should call that thing "old yeller" 'cause it's always there supporting my me, like an old friend...and it's yellow. BTW, that pad really works your biceps. I'm sore!

4th step; Sandblast the top with 150 grit silicon carbide to create a smooth silky finish. That also had to be done 2 times, 'cause it's easy to miss spots on a large surface. 5th step; A good hose down and wash. OK, I did that twice also. We just couldn't have any black grit showing up on a transparent bowl. That would just be wrong! 
This is the super high-tech level I use to make sure the disc is level on the mold.
The 6th step; spray coat the stainless steel mold with boron nitride spray. Remember to open the door or go outside...and you are supposed to use a respirator. I'm going to claim amnesia on that...I did open the door to vent the room and have air exchange. Kids, don't do this at home! Always practice safe glass! The 7th step; level the mold with a straight level - side to side, and then front to back. Then double check that. Nothing is worse then a wobbly bowl.

Here is the disc sandblasted and on the leveled mold, ready to slump!
The last step for me was to get the disc into the mold without disturbing the mold position and without hurting yourself in the process. I use 2 suction cups for this. Then I use the bubble level between the suction cups to position the disc in the mold so that the disc is level in the mold. Once that's done, all you have to do is clean the disc like crazy again with alcohol to remove any flecks of boron nitride that you might have disturbed, or any dust or errant molecules that might be lurking on the surface. At this point I'm usually ready to be drinking the alcohol!

Anyway, then you set the kiln! ....and Voila...!!! 2 days later you have a gorgeous big freaking heavy bowl that is 3/8" thick. Easy right? Sure, just ask the heating pad I'm leaning on....Also, imagine how glamourous I look while doing all of this. 

All in all, after all the steps, I feel happy and accomplished. Hundreds of little babies heads will be sprinkled with holy water and begin their lives surrounded by joyous parents and loved ones. They will hold hands, kiss, and rejoice...all in front of my bowl. It makes me feel like I'm a part of all of those occasions to come!

Try not to puke from all the sentiment ... I'm a sap!

Wednesday, December 21, 2011

Sometimes no glass gets done...

Like today.. It's been a long few days of closing out the books and making sure all the allocations are in the right place. I'm almost finished and ready to close the books on 2011! I'm looking forward to no more paperwork!!!

My year end thoughts are going something like this...

I'm finally ready to admit that our move to the new studio space was a gamble for us. It really could have gone either way, and oh boy, was I afraid of the change... but it was the best possible move we could have made! Business has been really good and very different! We've done more commissions in 2011 then in any other year. Our new location makes that so much easier, and the new wet room is a dream! I hope the trend continues in 2012! We're making a strong effort toward that type of business. We've joined Custom Made, a website and service connecting makers with customers, designers, etc. Take a look! http://www.custommade.com/by/gailstouffer-wireddesignsstudio

KilnFrog.com has had a fantastic year! We've sold more kilns this year than we did in 2008. Maybe in 2012 we'll beat our 2007 record! We're adding Bullseye Glass in 10" x 10"s and 17" x 20" half sheets for shipping, frit and stringers. We're also adding dichroic glass from Austin Thin Films. We'll be entering 2012 with over 60 kilns on the site plus all the glass. We're really excited about it all. By the way, the frogs name is Phillipe!

We went to the Texas Art Educators Conference this year and it was a great experience. We represented Bullseye Glass and Jen Ken Kilns at the show and we visited with our friends at Paragon Kilns. Everyone was lovely! We love the art teachers! Can't wait to do it again in November 2012!  It will be in San Antonio next year, so that will be even better. We're planning on hosting an event at the studio! Hopefully Larry and his mobile glory hole furnace will be part of the fun! Here's a picture of our booth from the show.


I'm really looking forward to beginning 2012, new and free and ready to fly!

I'll share more end of 2011 thoughts tomorrow.