Showing posts with label workshops. Show all posts

Sunday, August 25, 2013

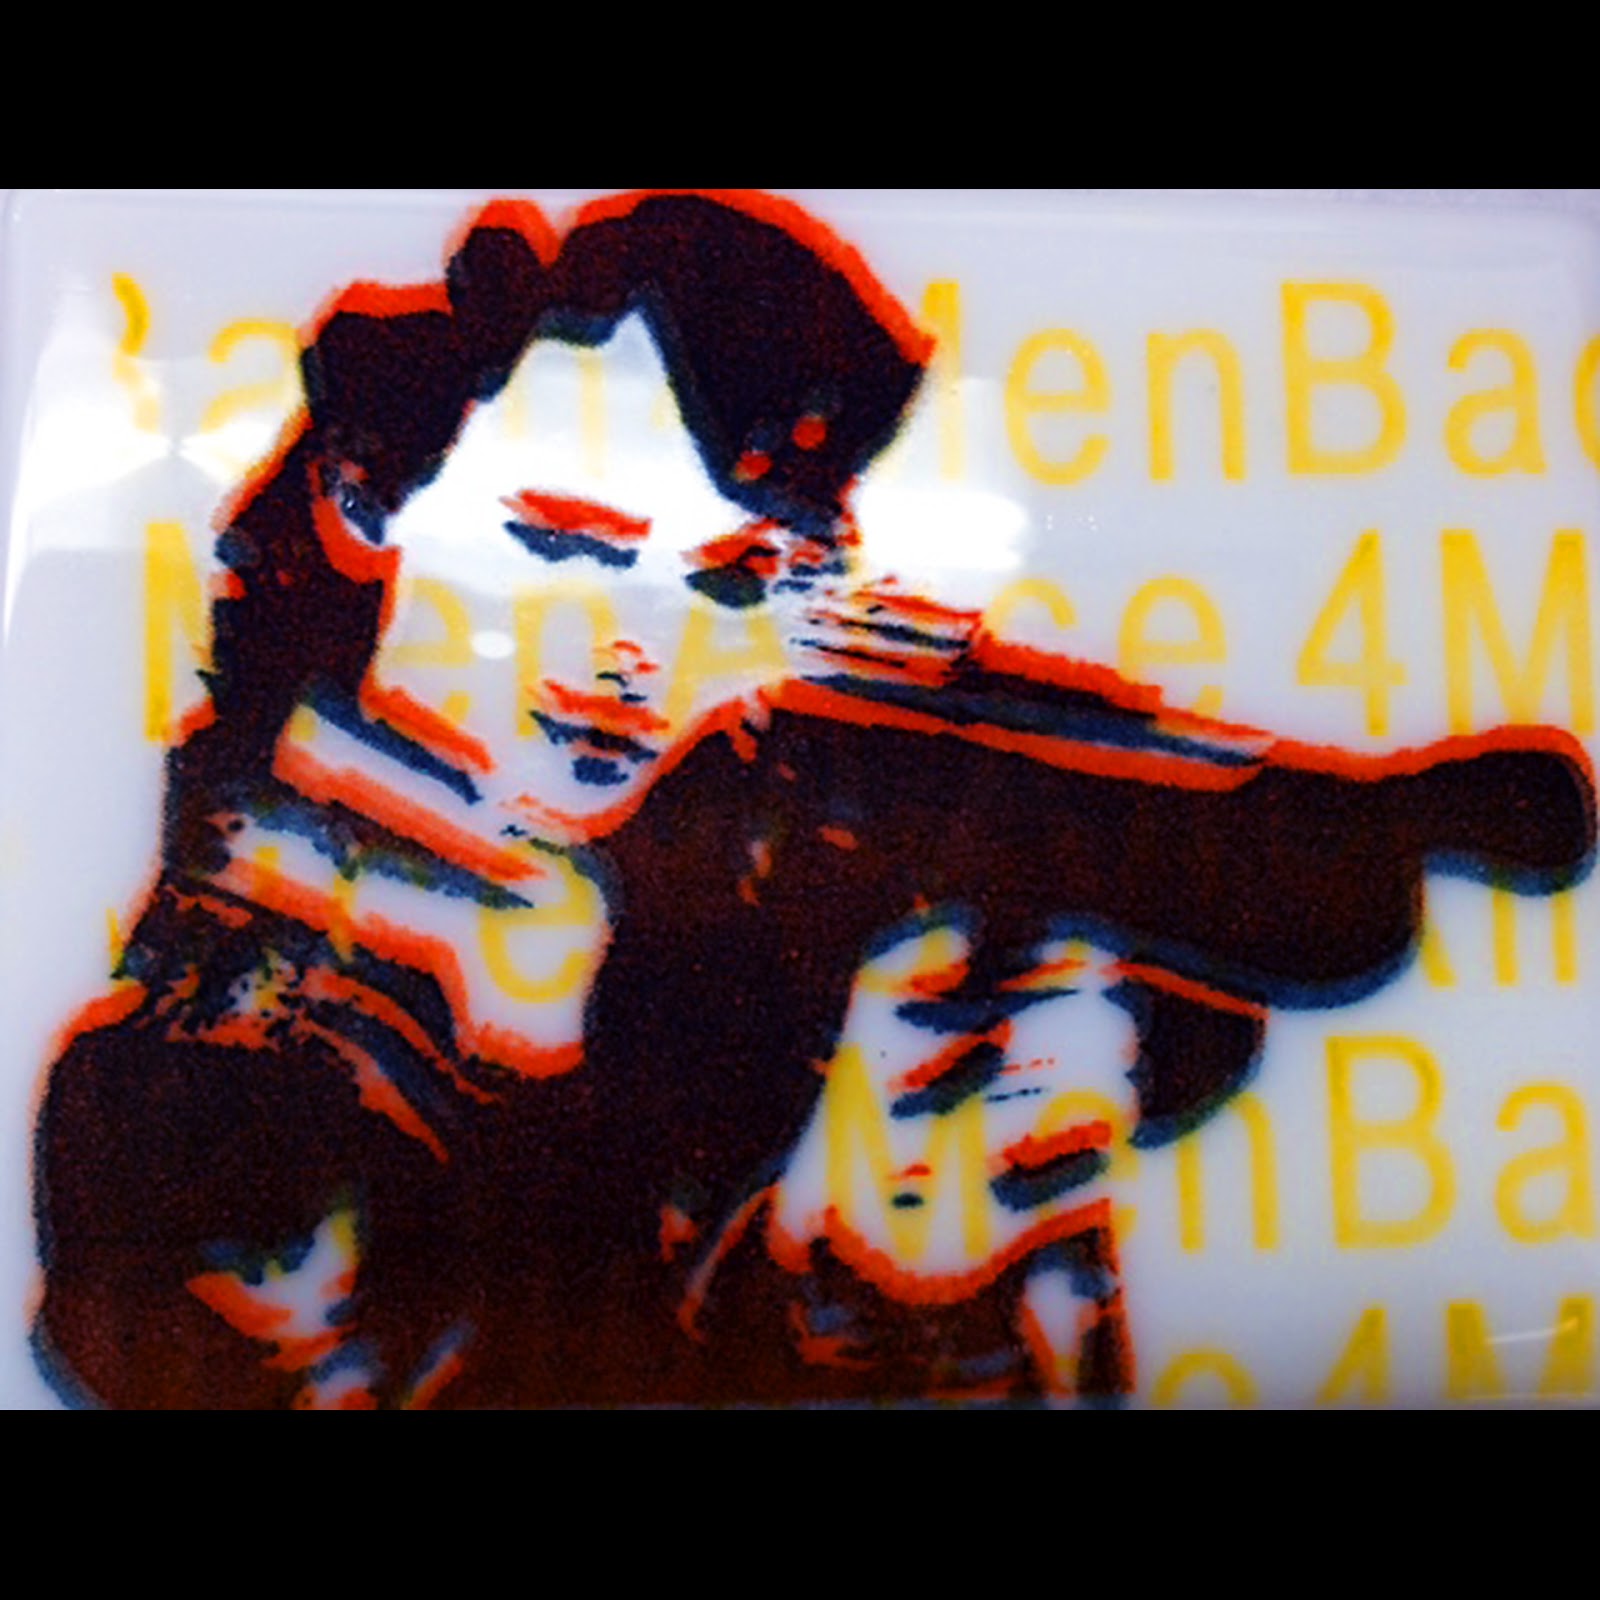
Screen printing on high fires!

I'm so proud of my great students. They worked really hard to get their images perfect! Way to go!!!!


What an awesome class!  My students were the best!  Here's a look at some of their great work!


Saturday, September 22, 2012

Santa Fe Powder Printing Class

I had a wonderful trip to Bullseye Glass in Santa Fe! My buddy Lisa came with me and it was awesome. We had a fantastic meal at Luminaria at the Inn at Loretto. One of the best meals I've ever had in Santa Fe. Thanks to Perry for suggesting it, I should have been quick enough to invite him and Nancy to dinner with us!

Stacy Smith is a fantastic instructor. She made the class fun and inspirational! Erik Whittemore, the resident Studio Manager was the perfect host/TA/collaborator! A big thanks to Morgan and her team for their support. Bravo on my best Bullseye experience ever! In my humble opinion, Stacy is likely the best ambassador of the all the positives of the "Bullseye Spirit!" I hope they elevate her to the appropriate status she deserves. Enough gushing! (Seriously, I hope they'll let her come teach at Wired Designs Studios.....c'mon Jim!!!!)

My fellow students were great to hang with and gave me a wonderful perspective on all of the different ways to employ these techniques. We were all doing our own things, and they were all so great and different! Thanks everyone. I got to hang with Nancy Weisser, Perry and Colleen, and we had an awesome time.

Here are a few of my samples from the class. I'll be incorporating this technique into my Printmaking Techniques for Glass classes going forward.

This powder print was fired twice; once for the background at full fuse, and then once at a tack fuse for the foreground image. I'm using imagery from my Women's Roles and Identities series.
These were images that we were given to play with in order to learn the technique.The 2 on the left are full fuse on 6mm, the 2 on the right are tack fused on 3mm. Both have equal merit and use.

Very little distortion! Halftones work really well.

Part of my Women's Roles and Identities imagery. This is all powder.....no sheet glass. Cool huh?

This was all done in a single firing! Love the effect!

Yesterday I had a private Torch Fired Enamels workshop. My student is a wonderful lady who has seen and done it all! We worked on stenciled enamels, and component projects. I had done the centerpiece of this necklace previously, and just wasn't completely happy with it. So my student and I added some components and took it to the next level.

I'm teaching this technique in Las Vegas at the Glass Craft Expo next year. It's called Glass on Metals!
I know that all my glassy friends will love doing this!!

This piece is copper enameled and riveted with silver connections.
I love acid green and turquoise together!

We were going for something Asian. These look really great on!

Saturday, September 1, 2012

Printmaking on Glass

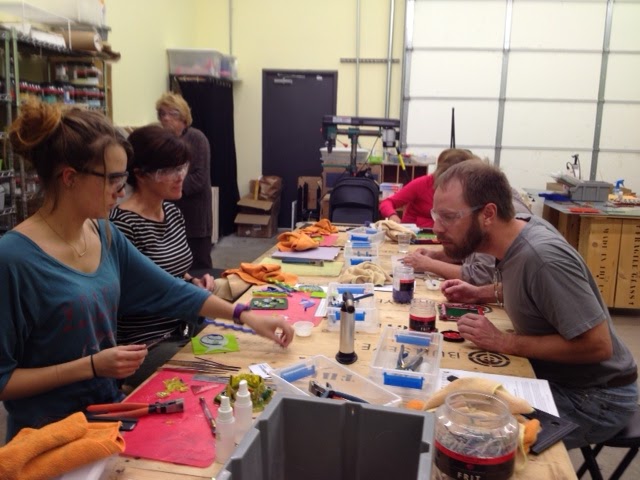
Wednesday's class was fantastic! We made silk screens, created our own photo resists, created photo transfers, worked with Gel Medium for ink transfer, and finally focused on direct painting with Enamels! The workshop, which was a consolidated version of our regular class gave everyone a taste of print making techniques and provided all the students with a sample of each type to take home. There sure was a lot to cover in a short period of time, but we did it and still managed to laugh!

A big thanks to Gary M. for his awesome seafood gumbo and homemade cornbread for lunch!  It was truly a southern treat!

Here are some pictures to give ya'll a feel for the whirlwind that was our day!

This is a combination of silk screened and photo resist samples.
There's even a photo transfer with some overlaid enamel!

More overlaid enamels!

Here's the gel medium transfers, and the photo transfers.

My sample of a silk screen thumb print under a photo resist figure.

This is a thick block that has photo resist works inside and an enamel painting on top.
This is in the kiln now! (I'll post a finished picture when it's complete.)

Here's my painted enamels overtop of a gel medium transfer background.

Here's part of the group dry filling their blasted resists!
Join us for the next one of these workshops in October!  Here's a few sample photo's.....


Monday, April 30, 2012

Last Week into This Week...

It's hard to believe that it's May 1st tomorrow. How is the time flying so fast! As usual, I'm a busy bee with all kinds of buzzing going around.

Here's the recap:

Grad School: I turned in my final 3000 word paper today! Yeah! Now I have just one more week of reading and blogging ahead and I'll be done for the semester. I'm glad I only took this one class to get my feet wet, 'cause it was a commitment with everything else going on. I don't know if school will get harder or easier, but I'm glad I'm doing it. This was a great class! Thanks to Ed Check, my TTU prof! The class was Research Methods in Art. I'll publish my paper if I get a decent grade, so you all can read it. It's revealing!

WD: This week I had a few classes; Drop Ring Vessels and PMC Silver Beads. Here are some pix!

These are 2 drop ring molds with their happy blanks sitting on top. It's important to make sure they are level before you fire them, so here's the bubble level on top....hope I removed that before firing! Both molds needed slight shimming to make them level. I'll post after pix when done!
Here's a PMC Silver lentil bead, it's approx. 1.5" It's hollow!

This is a glazed bisque bead with a PMC ribbon wrapped around it. This was fun to do. This bead is 1.75" It's almost too big. But i'll find something to do with it to make it cool and wearable.

This is a bisque bead that was painted with PMC and then PMC clay was applied. It's about  3/4". The other side has a cool leaf imprint.

This one is my favorite! This is a hollow PMC bead made by painting PMC slip onto a cotton armature, then layering clay and syringe over that. It's approximately 2" tall, and even though it's hollow, it's heavy. When fired, the cotton armature burns out and leaves the inside hollow. We're carrying the cotton armatures and the bisque beads at the shop if anyone wants to try this. SO COOL!

Also....Denise Leone will be arriving at Wired Designs studios on Wednesday to teach her class. I'm so looking forward to it. We still have one open spot if someone wants to jump in last minute. I'm excited because we're using Rapid Mask! it doesn't need a wash out! YEAH!!!!

Commissions: The vases for the the church in college station turned out great. They are still cooling in the kiln so I'll post pix of that tomorrow with the drop rings. The Alvarez gray metallic sink is slumped, but...alas....not all goes as planned and the rim is crooked, so I'll have to spend an hour or so grinding the darn lip. I know it make the vessel sink look even more stunning, but I'm kind of lazy, so I was hoping I wouldn't have to do it.

Luann's sink turned out gorgeous, but the casting was just a little too thin, so it had to go back into the kiln with more glass. Here's how that looked.


I added 2 more half sheets of color and some clear medium grit to bulk it up. Hopefully it won't change the color much, because the blank was gorgeous and the client approved us to go to the next step.

Saturday, February 11, 2012

Troubles in Glass Paradise!

If you've been following the saga of the 45 draped vases for City Year's gala event on February 28th, no doubt that you're wondering, "So ...what happened?" So... Here's where we are on the project. 

I'm rather frustrated over the events that have occurred over the last 10 days. It seems that my in my exuberance to plow through the project, I failed to acknowledge that the draping portion of the project would be more nuanced than expected. I've done this numerous times before without any real pain or heartache so I foolishly assumed that this project would be no different. DUH!! Not so much!

The first batch of 9 that I attempted to drape were a horrible disaster. As I was placing them in the kiln, on top of the molds, Stacey (my business partner) said, "I think you should do just one. You know, to make sure that your schedule is right."  In my excitement and (foolish) confidence I replied, "Relax...I know what I'm doing. Anyway, I'm being conservative with the schedule, so I'm sure it will be fine." FAMOUS LAST WORDS! 

I opened the kiln the next day and there were beautiful gem colored rings sitting at the foot of each mold. My conservative schedule was wrong! All the discs had melted right through the molds and ended up in a heap. I was convinced that I new  what was wrong with the schedule, so I again FooLiSHLY put 9 more discs (what was I thinking?) onto the molds, and fired up the kiln again.

This time, the schedule was good! Yeah! But my happiness so gave way to the sad realization that the lips on the vases were WRONG!  

Ruffled... and not so much!

The size was right, but the lip was NOT ruffled as it should be.  Now I had screwed up 18 of the 54 discs that I cast, and I needed 45 vases. EEEEK! 

Here's where we are now; I realized that what was wrong with the lips of the vases is that the discs were too thick to ruffle. The way to thin them out was to put the discs back into the kilns and fire them to a very deep fuse (un-dammed) to allow the discs to thin and expand in size. So I did that and then draped them again using the new schedule. The result; GREAT! Everything was perfect.... except....(cue the music from the movie Jaws...) That the bodies of the vases were too thin. This means that either the temp was too high or time was too long, or both. 

Meanwhile, that meant 3 more discs bit the dust! So I had to regroup and reclaim the discs that I ruined. Stacey helped me smash up all the discs, and everything had to stop while I recast 18 of the discs back to usable condition.

Finally, yesterday I cold worked 49 discs and put 12 in the kiln to spread into thinner and larger discs. I will have to do that on all of the discs. So at 12 discs per day, that will take me to 2/14.

On 2/15 I will have 13 days left until the event! OMG! ...and not one perfectly ruffled vase to show for a month on the job. DAMMMMMMM.

I'm sure that I can pull this off in time, but it might mean that I am driving these vases to the event on 2/28! If all goes right with the kiln universe, I can drape 9 vases a day beginning on 2/15. That will take me to 2/21. It doesn't seem likely that it will happen just that way...but a girl can still dream! I will be in the studio every day making this happen.

Not toasty at all!
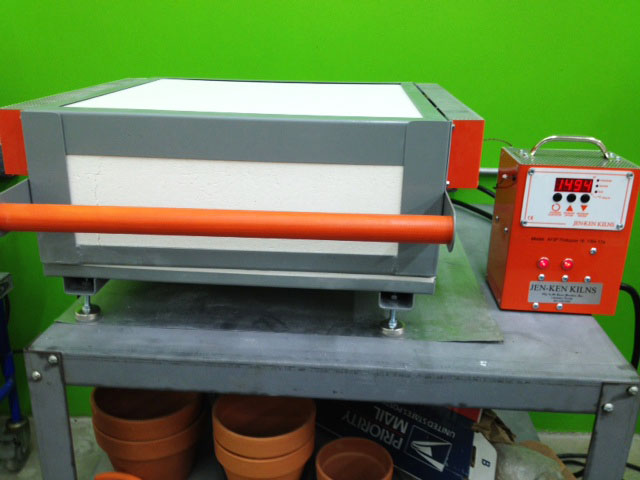
On a happier note, I am excited to be playing with my new Jen Ken Pro-Fusion 16 Square kiln. This thing rocks! It reaches full fuse (1470) in 39 minutes! That is killer fast for a 16" firing space. LOVE IT! I love that at 1492 degrees I can put my hand right on the top and hold it there without being burned, or even uncomfortable. Can't do that with a kiln wrapped in metal! Here she is in all of here glory!

I love that she's a clam shell too!

During the firings of the discs, I've been working on getting ready for my classes in Las Vegas. One of my classes is "Making Your Mark; Printing on Glass," and another is "Modern Jewelry; Beyond Dichroics." For both classes I'm exploring with images on glass that will come from woodcuts, stencils, stamps, free hand application/drawing, photographic images on overlays, etc. which will then be colorized with enamels, frits and powders, paints then and over or underlayed with foils, lusters, etc. 

These are some of the samples I put into the kiln last night. I put them on 0113, 0137, 0139, 0132, and 1100 to determine which colors give the best contrast and results. I'll take a picture tomorrow and show you how they came out.

All of these images I created from free clip art and vintage photos from the web. I manipulated and changed them for my purposes by eliminating backgrounds and increasing contrasts.

Saturday, February 4, 2012

Plate making class!

Today I had a plate making class. Here's a peek at what went in the kiln.

Tomorrow we'll cold work and slump them. I think they look great.

Friday, February 3, 2012

Another Beautiful Vessel Sink!

Just finished today!  You're seeing it before the client. This beautiful vessel sink will reside in the guest bath in a custom home here in San Antonio. The house is being built by Davis Homes. The design was inspired by the clients marble vanity slab, which is silver/gray with lines of cobalt blue and flecks of white and deep green. The interior designer, Debbie Stoli, is working with the clients to make their home a gorgeous place. I love working with designers because they really see lots of design possibilities when I start pulling out the glass. I think this glass vessel sink turned out beautifully!

This glass vessel sink is transparent steel blue-1406
and clear fracture irid 4101.31

Here's a close up of the texture and the drain.

....and another picture just because I love it!

Last night I taught a mini-class on torch fired enamels. We made some fun copper earrings and other little goodies!  Here's a few photos.

Charlotte and Rene torching away! Having a great time!

Charlotte's first enamel project!  Pretty great for a beginner!


Tuesday, January 31, 2012

Draping/Slumping in the kiln!

Finally the first batch of discs is in the kiln slumping!  Here's a little walk though my last few days on the project. I'll have a lot to show you tomorrow!

Here are the slumping molds. They've been sprayed with Boron Nitride and elevated on 12" kiln posts. I did that so we didn't have any folding or touching of the kiln shelf.
These are the final discs that I did. Several shades of ambers.
Here the discs have been cold worked, washed well, and placed on their molds.
Here is the Hendrick's sink in the mold. It will be finished tomorrow! Yeah!
Then I'll drill the hole and do the countersink on Thursday.
The glass needs to rest and stabilize before I drill the hole.
This is the demo tack fuse piece that I did with my beginner fusers class.
It's mounted in a frame and surrounded by frit. The piece is 6" square and the frame is 8".
It really pops!


Saturday, January 21, 2012

Weaving glass and all that jazz!

Friday I was privileged to have a private class with my old pal Gigi! We spent the day weaving, chatting, and having a generally busy, but good day. Here's some of what Gigi did!

Gigi weaving an awesome design!

another view of Gigi's Weave!

Here's Cathy's weave! She was motivated to do one  when she saw Gigi's!


Here is what I did while Gigi was weaving... Another 25 pounds of glass was smashed all in the name of the City Year glass Vase project! Then each piece was hand clipped with the nippers to get them smaller. Don't you love what a hammer can do to 6 half sheets of glass?

This is 25 pounds of Cobalt Blue tones
Here's how the turquoise ones came out... In case you wanted to know, these were made with turquoise irid, light turquoise, aqua tint irid, clear, and a smudge of light aqua, and a pinch of light sky blue.

These are the cast discs out if the kiln, and the final shape prototype.
Today is Saturday and I taught our Essentials of Glass Fusing Class. Here's my awesome class and my demo pieces. We had a great time! I love it when new students catch glass fever!


This is a dichroic pendant fully fused and a 6" square tack fuse piece
both going in at 1325 F for a little soak!
While my class was working in the cold room I weighed out the next batch of vase discs and put them into the kiln.  Here they are... each disc is 2.5 pounds-give or take a 1/10... if you really want to know.

Hopefully these look like a very different blue then the turquoise ones above.
I'm a tad concerned that they could be too dark. I added lots of clear and lighter tones into the mix, so hopefully they'll be deep blue, but still very translucent and bright. I used true blue irid, steel blue, light sky blue, clear, flecks of turquoise irid and opaque deep cobalt blue, and left over blue gray.  Cross your fingers for me!

The next batch is green, then reds, then plum tones.  So I'm 50 pounds in on the project so far.  I'm going to cast all the disks first, then cold work them all, and then drape them all last. If anyone has any thoughts, let me know. I've never had to do 45 of something before, so any knowledgable input is welcome!

Tomorrow I have a private fine silver/argentium fusing class with a student from Corpus Christi. I'm sure we'll have a blast.